Internet Dealing System Mobile for Smartphone
Installation manual
- Connect your Smartphone to a stationary PC by either placing the Smartphone onto a cradle or connecting it via USB cable or infra-red port. Synchronize Smartphone with PC (by using, for example, MS ActiveSync).
- Download Microsoft.NET Compact Framework v2.0 from the web-site at www.microsoft.com to your PC (this file is available for downloading from http://www.microsoft.com/downloads/details.aspx?familyid=9655156b-356b-4a2c-857c-e62f50ae9a55&displaylang=en).
- Start the downloaded Microsoft.NET Compact Framework v2.0 distributive on your PC (it will set up on your Smartphone automatically).
- Use the ActiveSync program to copy the IDSMobile.cab file into any folder of Smartphone (for example into the folder C:/Temp) and start the file.
User’s manual
- Starting the program
Click Start and then click the IDSMobile icon in the programs file if the program has not already started.
When the program starts up this window appears on the screen (Fig.1).
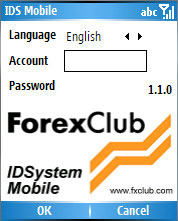
Figure 1
Enter your account number (login), password and select a language. Click OK. To exit the program click Cancel.
When the program has connected to the servers, the main window of the program will appear on the screen (Fig.2).
- The main window of the program
The main window of the program includes:
- Information about account (demo, real) and balance
- The main menu
· The main workspace with Positions, Orders, News and Quotes windows
· An Exit button which closes the program
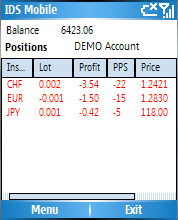
Figure 2
To access the main workspace windows click Menu and select one of the first four options on the drop down menu (Fig.3).
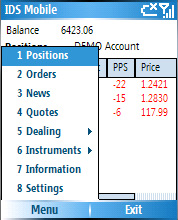
Figure 3
The Positions option opens all necessary information on your open positions including the instrument (currency pair), lot size, floating profit, this profit in points and the opening price. An arrow at the beginning of each line indicates the direction of the position (bought/sold). The color of the font shows the profit/loss of the position.
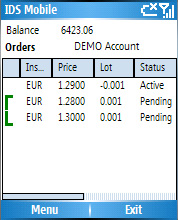
Figure 4
The Orders option opens all necessary information on
your placed orders including the instrument, price, lot size, status, type,
date and time (fig 4). OCO orders are linked with the symbols ![]() and
and![]() . The opening order in
If-Done orders is shown with a symbol
. The opening order in
If-Done orders is shown with a symbol![]() . Done and cancelled
orders are displayed against a dark blue background.
. Done and cancelled
orders are displayed against a dark blue background.
To delete done and cancelled orders from the table, select the order in Orders, open the Menu and select Dealing and then click Remove done/cancelled orders in the Dealing sub menu (Fig.5).
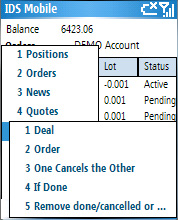
Figure 5
The News option opens a list of the most recent news headlines and the time of their release (fig.6).
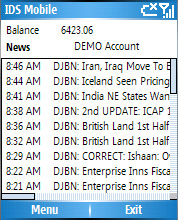
Figure 6
Important news is highlighted in red. To read the whole news item, click the headline. Once you have read the item, click OK (Fig.7).
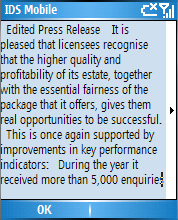
Figure 7
The Quotes option (Fig.8) opens a table of quotes under columns Instrument, Time, Bid/Last and Ask.
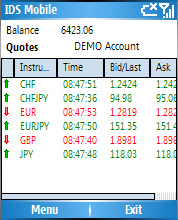
Figure 8
The arrows at the beginning of a line and changing font color indicate the direction of the quote change.
To add/remove information for any instrument open the Menu, select Instruments and then select or deselect pairs from the list.
- Working with positions
To place/remove/change a position, select Dealing in the main menu, and then Deal (Fig.5). The Deal window will open (Fig.9).
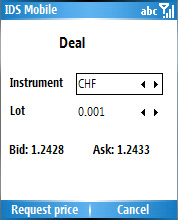
Figure 9
If you have selected a position in Positions, the Currency and Lot fields will display this position’s values.
The current Bid and Ask prices will be displayed once you have selected the instrument.
Once you have set the required currency and lot values, click Request price. Once buy and sell prices have been received from the server, the Buy and Sell buttons will become active and you should click one to make a deal. To cancel the request, click Cancel.
- Working with orders
To place/remove/change an order, select Dealing in the main Menu and then select Place/Remove order (Fig.5). The Order window will open (Fig.10).
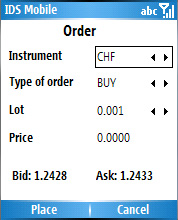
Figure 10
To place a new order, set the order parameters in the fields and click Place.
The current Bid and Ask prices will be displayed once you have selected the instrument.
Any order selected in the main Orders window will be displayed in the appropriate fields and the Remove button will be active. To cancel the order, simply click Remove. If you change the values in the fields, Change will become active. Clicking Change changes the order to your new parameters.
To place OCO orders, select OCO orders in the Dealing sub menu (Fig.5).
The current Bid and Ask prices will be displayed once you have selected the instrument.
The OCO orders window then opens (Fig.11).
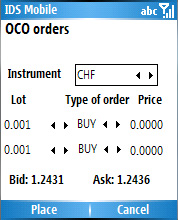
Figure 11
Select the parameters of your OCO order and click Place.
To place If-Done orders, select If Done orders in Dealing sub menu (Fig.5).
The current Bid and Ask prices will be displayed once you have selected the instrument.
The If Done orders window will open (Fig.12).
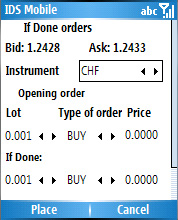
Figure 12
Set the parameters of your If-Done order and click Place.
- Settings and information
For information about spread, value of points and SWAP, select Information in the main Menu (Fig.3). The Information window will then open (Fig.13).
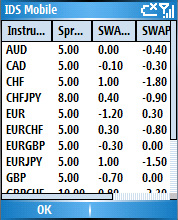
Figure 13
To change the settings, select Settings in the main menu (Fig.3). The Settings window will then open (Fig.14).
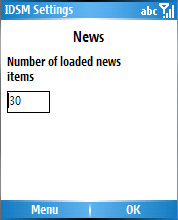
Figure 14
The Settings window has the following tabs: News, Password and Balance. To change the window of settings, click Menu and select the appropriate option. To exit Settings, click OK.
News (Fig.14) opens information about the number of news items downloaded from the news server. To change news settings, change the appropriate parameters and click Apply.
Password (Fig.15) allows you to change your IDSystem password. Change your password by entering your old and new passwords into the appropriate fields and click Apply.
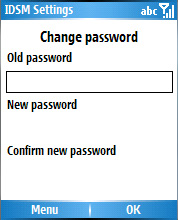
Figure 15
Balance (Fig.16) allows you to change the balance in your demo account. Change it by entering the new amount in the appropriate field and click Apply.
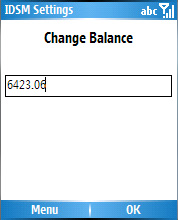
Figure 16